|
|
Post by will on Feb 11, 2007 18:07:56 GMT
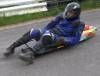
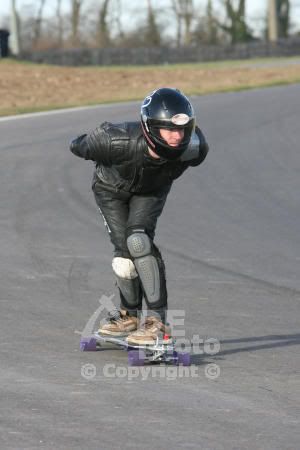
i was wonderng if i could have some help/ ideas for new streetluge idea i've had knocking around for past few weeks now. making a streetluge out of expanable foam them wrapping it in fibreglass. I've been looking on the website tom was talking about www.cfsnet.co.uk and was wondering what sort of fibre glass wuld be best to use: -Chopped Strand Mat (CSM) Grade 1 -Plain Weave 163gm Fabric 100cm wide -Plain Weave 200gm Fabric 100cm wide but i have als been reading about Kevlar Fabric, but is very hard to cut into shape, but i have been looking at a pair of kevlar cutting tools. just wondering what people think about this sort of idea? |
|
|
|
Post by Longy NSI on Feb 11, 2007 19:07:16 GMT
You really need a frame to "hang" the foam on when you apply it....this is the "pulling the luge up Cadwell hills" thing isnt it. What a friggin nightmare that was especially with the aeroluge.
You deffo need some sort of support structure like belly pan and truck mount points at least. You have to build the foam up in small 5cm or so increments as the foam tends to dry on the surface and stays soggy for days in the middle. Build up parts of the luge with blocks of polystyrene building insulation, its light and very strong plus it saves foam later on. After you've shaped it paint it with resin to harden it off a little more then you can apply the fibreglass. Make sure you cut accurately and try not to get any rucks or folds.
Kevlar is very heavy cloth and hard to do a hand lay up. Kevlar is vacuum pressed under high pressure in industry cos its a pain in the arse to work with. I made a speed deck with a Kevlar lamination a few years ago and it was like a tank, heavy but ultra stiff. I contemplated extreme violence when building that up.
Go with a light fibreglass weave like the 163gm its much easier to work around the curves. Get plenty of resin for repairs!
|
|
|
|
Post by windy on Feb 11, 2007 22:28:50 GMT
yes i would go with the cross weave and fit a ply core to the bits where you need to attach stuff to, trucks etc, it bonds well to the glass, check out the snowboard construction.. you could always make a mock up luge and then use it to make a mould, it means you need to make three versions but the finish will be great, i suppose you need to be sure you have the design purfect before you carry out that much effort, you can just lay the glass up and fill and sand to get it smooth and shiney.....
|
|
|
|
Post by tom w on Feb 12, 2007 9:20:09 GMT
Hmmmm - Basically you are thinking of applying surfboard construction techniques to a streetluge. Not sure if it is perhaps the best solution - one heavy crash and it'll be f*cked.
Even if you only have a minor tumble, and the thing gets scraped down the road, once part of the hard shell has worn through to the soft foam underneath, you will have lost your structural integrity. Now inagine you are up a mountain in the Alps, at the start of a 5-day freeride, and you stuff the luge on your first run - how gutted are you going to be??
Better with a hard structural chassis - and cover it with cheap lightweight removeable / replaceable GRP body panels that can be easily replaced after a crash or scrape - It works for the motorcycle industry!
Foam is best used to shape and form a mould, with which you can make your own panels. If you decide to carve some foam, make sure it is POLYURETHANE FOAM, and NOT POLYSTYRENE FOAM. (The white crumbly loft-insulation type foam is polystyrene). Polystyrene foam will react with most polyurethane resins, and melt into a nasty goopey mess. Poly foam is available from CFS, but its expensive. I'm using massive 8' x 4' foam sheets from my local flat-roofing merchant. Its 5" thick polyurethane foam, at a fraction of the CFS cost. (Though, it comes with a layer of black felt glued to one side, but it is easily peeled / sanded off!).
Will - you best bet is to go and find some books on GRP construction techniques. CFS offer a ferw on their website, but you will probably find your local library will have them too. If they dont, then give them the ISBN number for the book, and they will order it in for you!
Ride hard, Stay safe.
Tom W.
|
|
|
|
Post by JasonA on Feb 12, 2007 12:41:09 GMT
this is the "pulling the luge up Cadwell hills" thing isnt it. What a friggin nightmare that was especially with the aeroluge. Age-old rule of life: The simplest solution is always the best. Just take a bungee cord to tow it back up the hill like Pete Elliot did! |
|
|
|
Post by Longy NSI on Feb 12, 2007 18:43:59 GMT
Yeah got my thanes and my styrenes mixed up. Ebay is very good for bits of motorsickle to stick on your luge.......and yes Jason sometimes the simplest idea is always the best..... BUTTBOARD!!
|
|
|
|
Post by will on Feb 13, 2007 19:22:52 GMT
yer tom that was basic idea was from a surfboard!
but it'll be built up in the same way as my current luge, in layers, then if parts do break can replace, and fairing will be incoporatated on top pieces.
I've been reading about methords of building on the net but will deffo go outand buy few books and have a good read about it!
thanks for everyone's comments
Will
|
|
|
|
Post by Andy Wright on Feb 23, 2007 18:14:58 GMT
Hi Will, surfboards have wooden stringers to help with the strength problem it could well be worth while sorcing a secondhand surfboard blank as they are quite thick, it would be then possible to shape accordingly, but Tom is quite right about damage as a quick ding in the water is a drama imagine what it would be like with concrete! The solution could be to analize your prone spots that could get damaged and build in tough spots in those areas with a harder material. Push them boundaries!
That reminds me i still have 3 surfboards I have to repair before summer - damn!
|
|
|
|
Post by windy on Feb 23, 2007 21:55:44 GMT
You might be on to somthing there, a strong frame to absorbe the impacts and a light core with a good glass shell might be able to take the abuse, if you think how much of an impact a snowboard gets, combine the ply core and the wooden stringers with say an alluminium frame you might be on to somthing, would it be easyer to mould it or layer it up afterwards, thats the big question?  ?? |
|
|
|
Post by will on Mar 4, 2007 14:04:45 GMT
EWWWW YUK!!
just as a pratice i've covered my rear fairing with fibreglass, that was made with expanable foam. I brought some from local garage along with resin and harderen on first mix i used waaay too much harderen and it went soild in about 10mins when i was still working on it, but it is coming along alright and is pretty hard stuff to work with, but not as bad as i thought. just this rear fairing is going to weigh abit but from that will work out how much doing a complete luge would weigh.
Will
|
|
|
|
Post by Andy Wright on Mar 12, 2007 11:06:21 GMT
Mix the resin with the ratio of one pea to one golf ball dude!!
|
|
|
|
Post by will on Mar 12, 2007 17:21:08 GMT
i made the design for the fairing abit too complicated. but if i do the luge the way tom said would be much easier, might be seeing the company again this weekend and will ask about it.
Will
|
|
|
|
Post by trikesrule on May 24, 2007 10:19:02 GMT
Hey Will this is one of my (u guys call them soapboxs if it had 4 wheels) composite Billycarts. img169.imageshack.us/my.php?image=scottyhr2.jpg This is a pure composite. No mould was used in the build process. It's whats called 'scratch built' in the marine industry. See the rear guards - this is the surface texture of 450 woven rovings and thats what I recommend making your luge out of. My composite (and there are four of them) carts are made with the first layer being 450 CSM followed by 1 layer of 450 Woven Rovings then another 450 CSM then finished of with 450 Woven Rovings. An extra layer making 5 added before the final WR in the stress areas like around the steering head works perfectly. The Chop Strand Mat makes sure that each layer of WR is wet out properly. U can use 250 CSM if u like. I put pigment (comes in many colours) in the resin to give me a base colour. With a base colour if u scratch the surface it won't be seen anywhere near as much. The guys at the fibreglass supplies will tell u to put in 5% pigment but in the real world u don't need that much. I dip a large clean screwdriver in the pigment to a depth of 40mm and try and pick up as much as I can (once to 250ml of resin) and add that to the resin. Let the screw driver sit in the uncatalyized resin for a few minutes then stir slowly until you have a uniform colour. U can add more pigment for a greater depth of colour if u like. Cut your glass to shape being careful not to disturb the WR fibres. Now 450 WR dosen't like sharp bends so if you have a sharp radius smaller than three" use more layers of 250WR. My son rolled (triple rollover) this Modified Soapbox when he was seven (7 years back) and you could hardly tell apart from a couple of shagged wheels. Easily fixed with body filler and a bit of paint as the surface integrity wasn't broken. I painted / sponged different colours (house paint) on and covered it with 5 coats of clear. Back to the subject. Right mix your polyester resin at 2.5% - no exceptions and stir slowly so as not to create more air bubbles in the mix and only stir for about twenty seconds max. More than this will accelerate the mix. This will give you 20-30 mins work time on a 15-19 degree day. If u want a smooth surface finish off with body filler then paint it. The 450 WR leaves a dimpled surface. In testing the dimples are faster than smooth surfaces - fact. And when you scratch it it dosen't matter. Now if u are going to go with the dimples u must roll the air out and the excess resin out. This will leave a nice dimpled pattern but u must have wads of newspaper on the floor as it makes a heck of a mess. Make sure there is plenty of ventilation and never use polystyrene foam as when polyester resin comes into contact with it it produces cynanide gas. So that will either make u real crook or dead and we can't have any dead lugers running around. Back to the start. Your foam core. Ditch that expandable crap. Go buy yourself a sheet of 1/2" syntactic foam. You can cut it with kitchen carving knife hacksaw or a sharp knife. The thicker the foam the stiffer your structure will be. For eg over 8mm (5/16) foam I laid up 2 450WR with 1 CSM in the middle. The piece was about a foot square. 2 weeks later I clamped it to my work bench and told my mates to do their best to break it. They jumped on it (repeatedly), belted it with a sledge hammer etc. After about twenty minutes an almighty blow from the sledgy broke the corner 1/4 off. Not bad heh? U don't need a mould to make this luge. Presently I'm building a composite gravity bike and a head first composite (if my new Randels ever turn up) Street Luge. I'm hoping to have my composite gravity bike ready (and developed) in time for the World Gravity Titles at Washinton USA later this year. I think I covered most of what it takes to build a composite machine. Oh one more thing where u are bolting thru the foam it must be 'spudded'. Meaning that part of the core must be solid as the foam will just crush. I would slip a piece of alloy into the lay up then drill it later for the bolt holes. To make a real flat bed for the trucks put plastic garbage bag (smoothed no wrinkles) over the trucks slop a bit of bog onto the truck base and sit something heavy like a hammer on it. Wait till its gone off to a semi solid state remove truck and tidy up bog with a sharp chisel. Instead of alloy I've used bog and or hard wood. Custom wood works well. Thats it for me at the moment. Hope that puts u on the path to building to righteous composite building. Ain't nothing like it and a composite is faster than the equivalent metal companion. Don't know why but we the STBG have done heaps of testing and our composites are always quicker where ever we race. I'm not spell checking this as my daughter wants the computer. Keep you mouth shut and breath through your nose when using polyester resin. Oh and if you want the laid up resin to not be sticky after put Wax in Styrene in the resin (5%) or use waxed resin. I use waxed resin mostly as it's sandable like bog and it's already got Wax in Styrene in it. But you have to grind it (roughen) to join or add to it........trikes |
|
|
|
Post by trikesrule on May 24, 2007 10:28:59 GMT
Ok just had a look at my Modified Soapbox URL and it dosen't show up the dimpled guards at all. My Lazer helmet $450 worth has dimples and is worth 4 kmh. If u go to www.southerntasbillycart.com u can see the origins of how my favourite weapon the ZYMOL cart chassis was made. No molds were employed...........trikes PS go to Forum then General Discussion and click on how the ZYMOL cart was born |
|
|
|
Post by trikesrule on Jun 20, 2007 11:00:50 GMT
Modified Soapbox The Raptorcart  |
|
|
|
Post by trikesrule on Jun 20, 2007 11:05:43 GMT
Yeah it actually worked this time.........trikes
|
|
|
|
Post by trikesrule on Jun 20, 2007 11:28:14 GMT
Will this is what I call a flop. And yes it's the bottom of my Raptorcart and it will be my new street luge if my dam trucks ever turn up!  This is 2 layers of 450 Chop Strand Matt. From here I will cut out the areas and make the recess's for the trucks and add grab bars. I can also add some sort of bulge for a head rest etc. I used Unwaxed resin as I'm going to do the above mods. With Unwaxed Resin all I have to do is wipe the surface down with Acetone add the mods then glass it all up with Woven Rovings and yep it may look like a modified surf board when it's done..........trikes |
|
|
|
Post by will on Jun 20, 2007 18:18:16 GMT
wow be interested to see some piccys when its done!
|
|
|
|
Post by trikesrule on Jun 23, 2007 10:03:42 GMT
I reckon I will add some Dyneema to the areas that will possibly get scraped. Dyneema has a high abrasion resistance. Check with your F/G supplier if you are going to use some also cause it's pretty expensive but it may be worth it for a bit of added protection against scrapes and bumps. My carts and bike get more chips and scratches from transport than actual racing incidents although I've noticed a lot of luges with scrapes under the belly pan. Dyneema would probably be great in this area...........trikes
|
|
|
|
Post by will on Sept 4, 2007 18:49:51 GMT
i'm currently working on a jig to form some plywood into a dished pan. am going to use 10x 1.5mm birch ply and 1 or 2 layers of fibreglass. hopefully having the dished pan will stiffen it up loads and not flex as much, so will not need a spine on the underside of luge, therefore getting lower ground clearance. with the side being bent up this will also prevent the sides from scraping when i am conering.
so watch this space might have something in a few weeks (this also means the celica is yet again on hold!!)
|
|


 ??
??